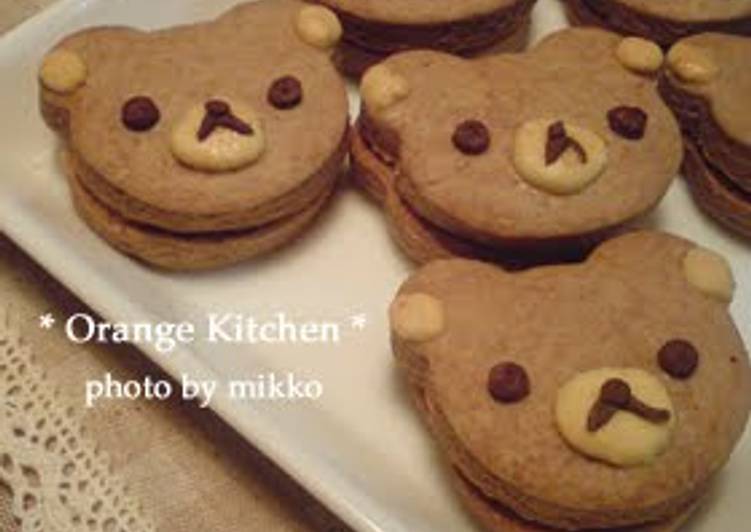
Ingredients of Cute ♪ Rilakkuma Styule Chocolate Sandwich Cookies
- It's of White flour.
- It's of Butter.
- You need of to 45 grams White castor sugar (superfine sugar).
- Prepare of Whole egg.
- Prepare of Baking powder.
- Prepare of or 3 drops Vanilla essence.
- It's of to 1 tablespoon Cocoa ※ For the face base.
- You need of Cocoa ※ For the eyes and noses.
- It's of Egg white ※ As glue.
- It's of Chocolate bar.
Cute ♪ Rilakkuma Styule Chocolate Sandwich Cookies instructions
- Preliminaries part 1 ★ Sift the flour and baking powder together..
- Preliminiaries part 2 ★ Sift the cocoa powder and sugar together, separately from the flour. Bring the butter and egg to room temperature..
- Mix the soft room temperature butter well in a bowl..
- Add the white sugar to the butter in several batches, and cream well until the mixture is pale..
- Add the beaten egg to the butter-sugar mixture in several batches. Mix well until pale and well blended..
- Cut and fold in the flour with a spatula, until the dough comes together. ※ Cut the flour in, don't knead it. ♪ Add the vanilla essence here too..
- When the dough comes together in one mass, set aside a small amount of it, and mix the cocoa powder into the rest. (The plain dough is used for the ears and mouth part only, so you only need to set aside a small amount. ♪).
- Take out a little of the cocoa dough, and add more cocoa powder to it. (This darker dough is used for the eyes, nose and mouth parts, so you only need a little. ♪ Do make it as dark as possible with the added cocoa though.).
- Wrap each piece of dough in plastic wrap, and rest in the refrigerator for at least 30 minutes. The first stage is complete. ^^ Take a break, then keep going. ☆.
- Line a cutting board and an oven baking sheet with kitchen parchment paper. Roll the main cocoa dough about 3 to 5mm thick, and cut it out with the bear shaped cutter. ※ Place the cut out pieces on the lined baking sheet..
- Roll out the plain (white) dough and the dark cocoa dough about 3mm thick also. Cut out the parts from each dough, and use egg white as glue to stick the parts on half of the face shaped base cookies..
- Bake the cookies in a preheated 180 °C oven for 10 to 12 minutes. ※ Please adjust the cooking time, or switch the position of the baking sheet to the top rack etc. while keeping an eye on how the cookies are baking..
- Take the baked cookies out and put them on a cooling rack. Stage 2 is done. ^^ There's just a bit more work left to complete the cookies. ☆.
- Chop up the chocolate roughly and place it into a bowl. Melt the chocolate by suspending the bowl over a pan of hot water. Spread the melted chocolate on the base cookies that don't have the face parts, and put the face-decorated cookies on top..
- Line up the cookies on a shallow tray or similar, cover with plastic wrap, and chill in the refrigerator until the chocolate filling has set. Done. ♪.
- Variation: Cutting out the middle is cute too. ♪.
- The cookies are not-so-sweet and delicious plain, without the chocolate filling. ^^ Add more sugar to taste to the dough if you prefer..
- I added some Rilakkuma cookies in an assorted gift box. They are a highlight and make the gift so cute. ♪.
- The Rilakkuma in the front row are taking a nap. Their relaxed sleepy faces are so comforting....
Get Latest Recipe : HOME
